Visar inlägg med etikett german. Visa alla inlägg

söndag 11 juni 2017

I might need to make a new dress for this shift

As many may know, I am a huge fan of the art of Nüremberg artist Albrecht Dürer. One of my absolute favourite pieces is his portrait of the Young fürlegerin with her hair in braids. I have looked at this so many times and I still find new details in it. Now I want to look specifically on her shift, or hemd as it is called in German.
It is a lovely hemd, with an embroidered smocked front and black lining along the neckline. But as one looks at many different portraits and paintings from the same time and region, I noticed something about that neckline. The back seems to be drawn down towards the front so that the back neckline also covers the entire shoulder. I will try and illustrate what I mean with some more pictures.

Wolf Traut, Portrait of a woman, Nüremberg 1510

Hans Holbein the Younger, Portrait of a woman

Detail of a painting, showing the Young woman in green in a similar hemd
The back seems to be a rounded line, not indicating a seam or anything other than over the front shoulder where it meets the front.

I found this a bit intriguing so I had to experiment a bit with a simple version af a hemd, where the back is wider than the front, thus curving down over the shoulder and forming that seamless line down the front.

So my version is a plain shift in two pieces, two sidegores and sleeves and in order to clearly illustrate the slanted backpiece/shoulder, I put in a small lining of the neckline in black silk. Here it is:
The shoulder part hanging down in the front

The hemd when done


Construction with sidegore sewn directly to the sleeve

Worn with my blue Hausbook dress over it

And clearly I have nothing to wear on top of it, since all my dresses are fairly high in the neck and doesn´t show anything of the shoulders.


måndag 25 november 2013

Just added a little piece of bling

So it is done, my new smocked shift. This time I tried hard not to make a neckline that scoops too low, a thing I always manage to do with my shifts. It took a few times of pinning, trying it on, repin it and repeat.

The inspiration is mainly the finely smocked shifts and shirts from really late 15th C Germany, such as Dürers shirt, and I looked into the larger number of extant Italian camicias of the 16th C for the cut and also decorations. Here are one example of the sleeve and gusset that I liked:
I did however choose a different layout of the gusset since I did not want to much fabric to gather in the armpit of my rather slimfitted kirtlesleeves. Another great inspiration is the shift of Mary of Hungary, ca 1520:
When I displayed my last smocked shift (read about it here: http://www.renikasanachronisticadventures.blogspot.se/2013/04/all-dressed-up-housebook-style.html), I did get the question why I had made such big and coarse pleats in the neck insert. I thought about it and figured I was just taking the easy path and thus challenged myself a bit this time. So I made the pleats so tiny I had problems getting them to form, and got the tip on damping the fabric and then gently pull in the direction of the pleats, and the linen gently pleated itself.

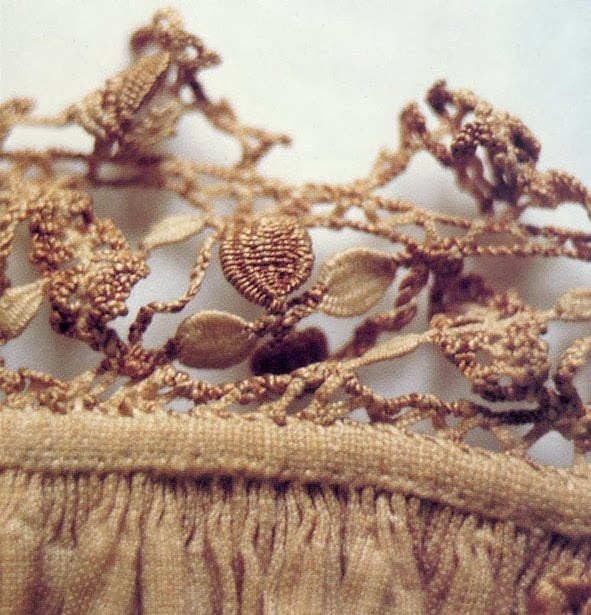
One of the main reasons for making this rather plain shift with a simple white smock was that I wanted to use the lovely antique golden lace I got from my mother in law, forming the edging of a lovely but really worn brocade table cloth. And there are some extant camicias with golden lace on the edge, excellent inspiration:

And this is how it turned out, with a side gore inserted and replacing the armpit square gore. The cuffs are plain and simple, since they will not be showing at all.
It took some effort to get the bias sewn to the smocking on the neckline and then attaching the lace, but I do think it was worth every minute and every pricked finger, this will for sure be a well used smock.
 First I pinned the bias strip over the smocking, trying not to stretch it too much.
 Then I sew the bias down over the edge, thus forming a firm edging for support of the rather heavy golden lace.
 The lace was pinned on and then sewn with a fine brown silk, that does not contrast too much to the rather old looking lace.

söndag 10 november 2013

Pretty protection

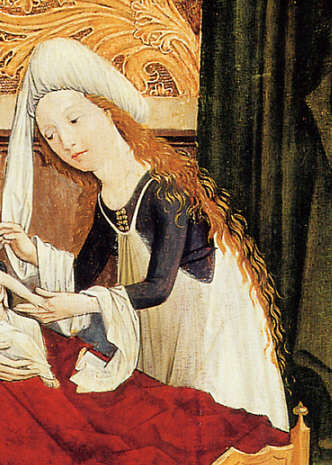
In striving for a full and complete late 15th century wardrobe I simply cannot be without a good apron. And browsing through period artwork the double apron, or Doppelshurz, sticks out as the most common. And it is so functional, protecting the skirts both front and back. Some call it a midwife´s apron, and it is definetly common in depictions of the birth of Christ on the female helpers, but it shows up in other situations as well.
Apron

For my apron I decided to gather pleats on top front and back, and the fabric I used is not pure white as in most depictions, but striped with thin black stripes. But I decided not to be to true to the originals but to make my own interpretation. It turned out to be a bigger project than I had imagined, mainly because my stubborn decision to pleat it so much. But the result was worth it and I will be proud to wear it at our next upcoming local event, where I will be head cook.
 The weather could have been better but here I am, standing in a rather cold November rain, in the Housebook dress, the new smock that is almost done and the apron. I was afraid that I would have to shorten the shoulder straps, but it worked just fine. I bought the fabric from my favourite Polish merchants at the Medieval market in August, it is a rather fine linen with black stripes and I just loved it at first sight. I sew it with flax thread and the smock is sewn with a rather heavy black silk, reinforced in the back with similar seams in flax.


The cut is really simple, I think it ought to be two rectangular pieces, just gathered at the top and sewn together in the sides, but I found it hard to get the smocked part as thin as I wanted it so I simply cut it into two trapezoid shapes. The top part I gathered with a smocking thread and then I sew right across the pleats with the black silk, reinforcing the back with similar seams, approximately two centimeters apart.

måndag 13 maj 2013

A kirtle´s diary

Since I couldn´t go to a whole week event with just one dress in thick brown wool, what if the weather turned out nicer than promised, I had to sew myself at least one new kirtle. Said and done, I had gathered some images and studied the sleeve-cut that I wanted to try out and thought I would challenge myself a bit again. And why stop there? No, I picked the fabric I got at a flea-market for handicrafts, one piece 1,5x0,5 metres and one piece of 1,5x2 metres. No chance of getting more anywhere should I cut it wrong. It is a really nice reddish brown thin wool in a twill weave.
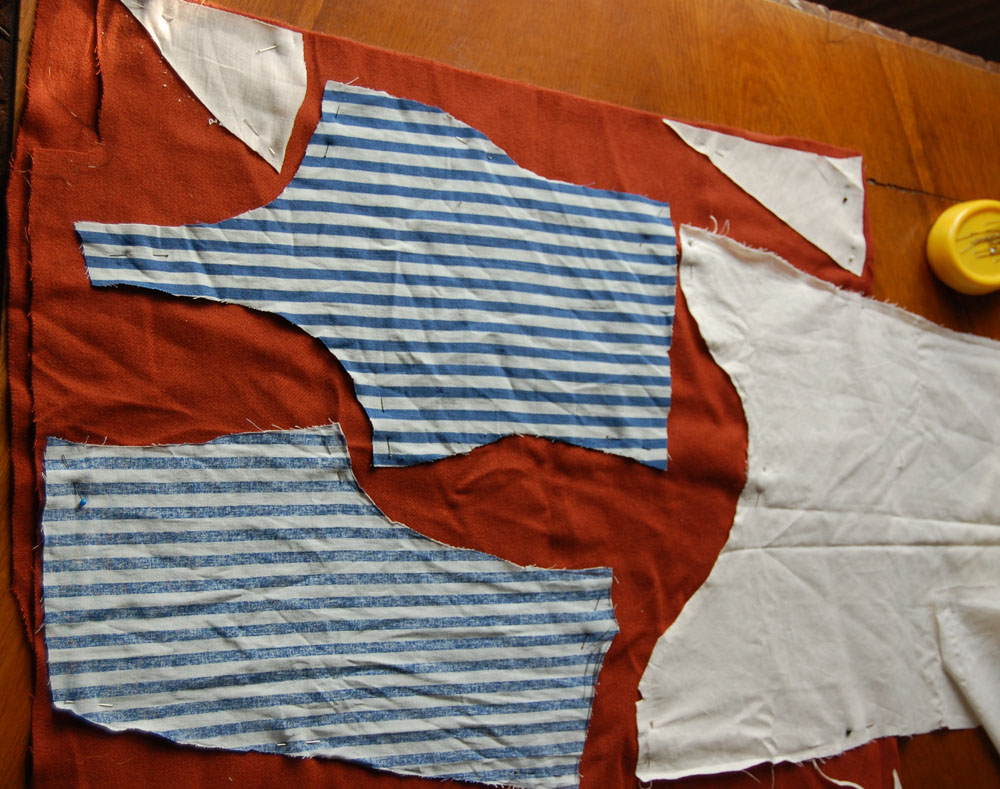
It took some thinking, but I managed to get the bodice and sleeves fitted into the smaller piece which left the larger portion of fabric for the skirt-parts of the kirtle.
Then I had to try to decide on what to use for lining, the choices being a non-bleached linen or a really thin green wool. With some support I decided on the wool, mainly because it went so well with the brown colour-wise.
When the lining was cut I first basted along the seam-allowances to keep the to fabrics together before starting sewing the pieces together. Starting with the sleeves I stitched the sleeves and two gussets together, pressed the seams, cut down the seam-allowances and then started felling all seams.


Ironing the bodice back before assembling the bodice and then the easy part, stitching the four skirt-panels together and finally assembling it all. I use a hot iron and a damp cloth to protect the fabric when ironing it.
 I did consider sewing a strip of fabric covering the seam-allowance between the skirt and the bodice to avoid shafing, but decided not to. The fabrics are pretty smooth anyway.
Finally, time for eyelets, having felled all seam-allowances and hemmed the entire dress. This should be done in no-time, right?


The dress got done in time, eyelets and all, and I enjoyed wearing it with my new striped veil that got hemmed while traveling for the event. This is me outside Hovdala castle all dressed up, and the other picture is when wearing the striped veil, which came in very handy when touring the insides of the castle with really low doorposts and sloping floors. The guide spoke of a gardener that once got a concussion trying to get through one of the doors, misjudging the height entirely.

But of course there is always room for improvement. I find the sleeves a bit hard to move in, so I will take them out and tweek it for a bit. Might even make a new and longer gusset in the back in order to get more room.

Fake it til you make it

Since I got the kids my hair is just not as full any more and braiding it is not as fulfilling any more. But braids are not optional when reenacting German 15th century, they show under the headdress all the time. I was considering buying fake hair, but I don´t like modern fake materials (I can tell you stories of how much money that has saved me when stopping me from buying mixed material fabrics...). So just before leaving for Double Wars, a week-long event, the Curious Frau laid out pictures of fake hair made of strings or yarn, and even in fancy colours.

On the altar you see St Klara´s fake hair in bright blue and her gefrens in yellow. This had to be tried, I thought, waking up at four in the morning of departure and remembering a set of bright blue silk/mohair-yarn in my yarn basket. It was found in time and at the event I tried it out. I divided it into three, made a small braid holding it all together in the middle. The braided part I put in the neck and then divided my hair and braided it together with the blue yarn. The yarn being longer than my own hair helped keeping my braids together and lengthening them so that it easily wrapped around the forehead. These pictures show it worn with a simple orange gefrens.


tisdag 23 april 2013

I´ve got stripes!


I fell in love with this beautiful but oh so simple striped veil the first time I saw it and have ever since been looking for a woven striped linen. And that is hard to find, I tell you! But this weekend me and the husband ran away on a little vacation of our own in London (yes, without kids!) for my birthday. The birthday was wonderfully spent with shopping in the textile district at Goldhawk Road. And there I found it, an orange striped rather thin linen. And dead cheap too. Now it will be carefully washed following Marias instructions (http://indemejarecristi.wordpress.com/2013/04/16/a-short-guide-washing-guide-for-linen-2/) and then hemmed. I think I just might make into one three metre long veil...or two 1,5 metre long ones. Either way it will give my rather slim closet some well needed variation.

måndag 8 april 2013

All dressed up Housebook style

This started out as a keen interest in the late 15th century German garb a couple of years ago, and I have made some tryouts aiming for a dress with the pleated panels in front and back as seen in so many drawings and paintings from the time and region. However, I struggled with how to get enough bust support with such a lowcut dress with the pleated panels and never found a good way of doing it. Until the first pictures of the Lengberg finds hit the internet, showing supportive underwear from just the right time and place! Here was the answer to all my garbquestions. No need to make the dress work supportive, it is all done by the under-garments. And since I lost a lot of weight and changed size, the need for making new garb got urgent and a friend then asked the trick question – When going new, will you focus on just one time and region and explore it completely? I raised to the challenge and this is the first results. The accessories are not all completely new but made by me within the last three-four years.

My Lengberg brassiere all done
The aim is getting a complete and welldocumented outfit suitable for a merchants wife in one of the southern German towns of late 15th century, like Nürnberg where Albrecht Dürer resided.

In some details I have to refer to pure guesswork, where no good sources of preserved garments and/or good detailed artwork are to be found, but I then aim to do an educated guess, based on sources from other geographic regions than my chosen one, either actual finds or artwork.

  The shift

 My inspiration for the shift is a variety of paintings, mainly by Albrecht Dürer, showing both men and women wearing elaborate smocked and embroidered shirts/shifts, all showing in the deep V-necked kirtles or jackets. When examining them closely, you´ll find that it is most likely a very fine and tight smock with white-work embroidery covering the pleats and then a small ribbon or golden lace attached to the neckline. In most of Dürers female portraits the shift shows covering the shoulders and neck as well, but in his selfportrait it is clearly a different model, with a tight smocked frontpiece and the shoulders of the shirt not showing at all. In other depicitons of women the dress is always a deep V-neck but there the shift is only showing in the bottom of the V as a small insert. I have therefore chosen to make a simple shift with some more work done on the front panel, that will be the only thing showing. And after quite a lot of experimenting I had to give up the idea of actual whitework over the pleats. In some close-ups it looks like couched whitework and that is simply too much to chew on for me right now. So my shift, in a rather sturdy hemp that holds the pleats nicely, is inspired by Dürers shirt but not as elaborate. The embroidery is a simple smock done in golden and white silk. The cut is a simple one, a A-shaped backpiece, two frontside-panels, the inserted pleated frontpanel and arms with a square gusset. This cut seems to be in style, as far as style goes concerning undergarments, for centuries, shown in English 16th century fashion and in the early medieval days, shown in preserved garments like Thomas Becketts shirt or Infantin Marias shift from the 12th and 13th centuries. The shape of undergarments of course vary as they start to show, with wider arms if shown in slits or open and laced arms, but when not showing and worn under a tighter straight sleeve the arm of the undergarments is adjusted. I have therefore chosen a straight arm in my shift, not to tight so that I can push them up when needed and so that it is not too bulky under the straight arm of the dress.


The dress/kirtle


I have long wanted to make what is popularly named “the Housebook dress”, after the numerous pictures done by an anonymous engraver and painter, who lived and worked in South Germany in the last quarter of the 15th century. 

The three pictures above shows some of the variety of dresses in his and others artwork, but they all have the characteristics of a deep V-neckline showing the shift and pleated panels in the front. In the St Catherine-picture you clearly see the cut of the dress, with a waistseam, not showing in the pleated frontpanel, which was propably one whole without the waistseam. Most of the width in the skirt seems to come from the pleats and not from the sidepanels at all. In Dürers portrait of the young girl the same inserted pleats show in the front and the dress seems to be with a waistseam, however not that obvious. In this portrait it is also noticable that there must a front opening.

Others have made dresses like this before, one real inspiration has been Bettinas Pages but where she has chosen whole sidepanels I really feel that the fit of the dress improves by giving it a waistseam, and one can find both with and without waistseam in the artwork. Considering the back of the dress there are some depictions showing that there is an inserted pleated panel there as well, and that the arms are inserted deep into the bodice, similar to the “Grand Assiette” in for instance the Charles de Blois pourpoint or the Queen Margareta kirtle, both dated to the late 14th or early 15th century. I have sadly not found any source of a preserved garment with the Grande Assiette-sleeve from late 15th century, but there is plenty of examples in the artwork. The sleeves vary as well and I have chosen to make mine simple, a straight full length arm with some width for comfort and room to move, since I want this dress to be used for all occasions, not just for finery. Since I have chosen a good quality dark brown wool, I find that I do not have to reinforce the pleats or couch them in any way, so I have simply gathered the top of the panels in pleats using a strong thread(I tried silk with the first panel, not to be recommended since silk is way to slippery to make good and sturdy knots fastening the string before pulling the pleats together, so I turned to linen thread instead), and reinforced with some parallell seams across the pleats on the backside. 
This is one of the two frontpanels, stitched for pleating, with the seams 1 cm apart.

This is the turnout

Measuring in order to know how large to make the cutout in the bodice.
The bodice is fully lined in white linen and I have chosen to keep the lining in one piece covering the inserted pleated panels for extra strength and support. Another possible way to make the pleats would be sewing them one by one, like in on of the Herjolfsnes garments, and I might give that a try next time.
The frontpieces of the bodice with cutouts for the pleated panels.

Front of the lining, showing the lining extended so
that it completely covers and protects the pleats.

Backpiece with lining, stitching all seams
together before assembling the bodice.

Stitching the backpieces together.

The back with inserted pleated panel.
The front will be fastened together with hooks and eyes, similar to Bettinas dress, since I cannot see any other way of making it. A lace with small ringlets, as she suggests at first, might be a possible solution but hooks and eyes works best I think. There actually is a preserved linen lining from Lengberg, of what must be a girls dress, and it is sewn with coloured silk. It is mentioned that there is a metal hook still preserved in the bottom of the front V of this lining. However, there is not an actual opening, but this find shows that linen lining was used, as well as silk thread for sewing.
I´m quite happy with the turn-out of
the sleeves  with the large armscye.
I have used one big gusset in the sleeve.

The headdress

In many of the depictions a veil with pleats over the forehead is shown, often with the Gefrens covering the neck and with a long band/vimple either tied up around the chin or hanging loose over the shoulder. My headdress consists of a square linen veil, folded in tight little pleats in one end, stitched to stay in place, and of one narrow long piece to be used as the vimple, tied around the chin or simply wraped around the headdress and then left hanging loose at one side. There are even more elaborate headdresses, probably with some kind of upholstered ring on top of the head, similar to later times Wulsthaube. My veils can be used like that as well, using my Wulsthaube that I made some years ago. In some depicitons it is clear that the vimple is actually a part of the pleated veil, in others it seems to be a simple square veil with pleats simply snugged in at the neck.

The gefrens is a little fringe of wool yarn fastened to a ribbon to tie around the head under the veil. There are depictions of young women using only the gefrens over their braided hair and there seems to be a variety of colours, even multicoloured ones. Mine is simple green, and made by using the loose threads as weft into a woven ribbon using a rigged heddle. 
The lady on the left is wearing the full headdress with veil, vimple and gefrens,
while the lady on the right just wears the gefrens over her braided hair.

Belt, purse and stockings

Now for the last finishings. No attire is complete without these things, a belt, a purse and a pair of stockings.

The belt is the simplest belt ever, since I haven´t found any pictures of elaborate women belts in the artwork from this time and region, but simple, thin belts just enough for holding a purse. Black leather in a 1 cm wide strip, with a very simple brass buckle, sewn to the belt.

The purse is another story, I found these purses with a number of smaller purses attached to it, in drawings and etchings by Albrecht Dürer.

I made mine in a good quality dark blue wool in a foursplit pattern, and four smaller purses attached, one on each of the four pieces. I have used beads of bone and metal for fastening the lucet cords use for the purse, all made in green wool yarn. And around the opening I used a red lucet cord for reinforcment and adornement.

The stockings or kneehose are in the area of the educated guess. I have not found them in the artwork, nor in any preserved examples from this region. Kneehose have however been found among the Herjolfsnes garments, made in wool and with no whole foot, and a hose fragment has been found in Lubeck as well as one possible kneehigh hose from London. All these preserved examples are in wool, sewn and dated from late 13th century to 15th century. Sewn stockings are therefore my choice for keeping my feet warm.

My hose are sewn in a soft pink wool fabric, in three pieces, one leg, one covering the foot and a sole. Although most preserved hose are sewn without a separate cut sole, there are examples in artwork showing a sole, sometimes differing in colour, suggesting a reinforcing sole, maybe in leather.
                                                                 
And this is how it all looks: